Detailing the Engine (cont)
Welcome back.
In my last post I described the process for creating the scratch-built gun bay access panels. I also mentioned that the gun bays would be left open, showing the detail inside. The kit does provide the two Breda-SAFAT 12.7mm machine guns, however the quality of the parts is rather poor, especially the gun barrels. I therefore decided to replace these with some brass items from Master-Model.
Until these arrive I will put the gun-bay project on hold and shift my focus back to the engine bay detail, specifically adding the Oil and Engine Coolant lines.
We will first start by having a look at the tools and materials used.
Tools and Materials Used
- Copper Wire - various thicknesses up to 0.5mm
- Plastic Rods
- Superglue
- Pin vise with 0.25mm drill bit
- Tweezers
- Good Reference Diagrams
Preparing the Hoses
Reference photographs of the wheel wells clearly show quite a number of flexible pipes of different widths going to and from the engine.
To make these hoses I coil a strand of the thinnest copper wire I can find (approx 0.25mm) and wind it round a strand of thicker copper wire creating a coil. By combining wires of different thicknesses I prepare a number of different hoses ready to be used as necessary.
 |
| Creating a hose |
 |
| Assorted hoses |
The Engine Cooling System
The engine cooling system can be divided into two sections:
- The reservoir and pipes leading to the engine
- The pipes leading from the engine to the radiator and back.
The above are situated at the top and bottom of the engine bay respectively. Starting from the top, the coolant reservoir has four, relatively thin pipes running to the engine. I take the thinnest coil there is from the set I prepared earlier, cut four separate strands and glue them to the tank. Drilling the tank using a pin-vise and inserting the wire into these holes provides both a better bond and better look:
 |
| Attaching the pipes to the tank |
The wires are kept rather long on purpose. These will be cut to size later on in the build.
 |
| Test fitting the assembly to the firewall... |
 |
| ... and engine |
I also glued thin strips of aluminium to the pipes to simulate fastening clips.
The rest of the plumbing is simpler as it only consists of a couple of thicker pipes coming through the firewall and under the engine. These can simply be cut to size and positioned once the engine is installed.
The Oil Cooling system
The oil cooling system is slightly more complex, involving even more pipes and fittings. A quick look at our reference diagram reveals a number of "T" joints in the system which I decided to tackle first.
Using a 0.25mm twist drill I drill holes down the centre of a plastic rod, as far as I can go whilst keeping to the centre as much as possible. This is then cut to the required lengths and the copper wire is passed through.
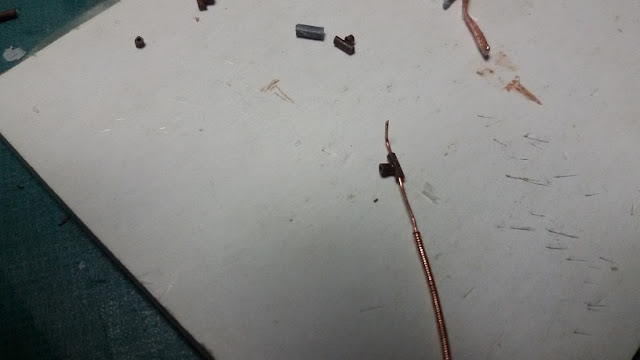
The following sequence of photos illustrate this process:
 |
| Drilling the plastic rod |
 |
| Passing a copper wire through the drilled hole |
 |
| Gluing a shorter section of hollowed plastic to form the "T" |
 |
| Another view of the "T" |
 |
| The finished items |
The next step is adding lines from the oil tank, leaving any excess as necessary.
The oil tank is then test-fitted to the firewall:
 |
| Test fitting the oil tank |
It is now evident that the entire plumbing system will have to be painted separately before assembly as it would be nigh impossible to do so otherwise. Furthermore, the excess length of the piping can only be trimmed to size once the engine is securely installed i.e. after it is painted.
Next Steps
Even though reference photos show even more wiring, it would be foolish to attempt to add these now. The model has come to a stage where things need to be glued into place to see what (if any) space will remain for any extra detail. This is especially true for the top area of the engine bay where the engine coolant tank sits between the machine gun barrels. I need to make sure that there is enough space for the new brass items to fit properly.
Final Words
I would like to finish off by thanking all those who have visited this little corner of the web so far. Please feel free to leave your comments, especially feedback on how I can improve these posts.
Until next time...


No comments:
Post a Comment